Step 1 - Download and install Mule Studio
Download the Mule ESB Community Edition from www.mulesoft.org and save the distribution package zip file.
There is no installation required. Just unzip the package to local drive and we are ready to go.
Step 2 - Launching Mule Studio
Navigate to the directory that contains the muleStudio.exe executable.
Launch the muleStudio.exe to start the application.
Specify the workspace location on the Select a workspace screen.

Step 3 - First Steps
The First Steps screen is displayed if the selected workspace is a new one.
Click Go to Mule Studio to start using the application.

Step 4 - Create a new project
Go to the Studio application menu, click File > New > Mule Project.

On the Mule Project screen, specify the project name and click Next.

On the New Mule Flow screen, select the Select to create a new message flow in the project checkbox, and specify the Name, then click Next.

On the Create a Java project screen, use default setting and click Next.

On the Java Settings screen, use default setting and click Finish.

Once the project is created, the Studio opens the Flow editor for the new message flow.

Step 5 - Build the Hello World message flow
Drag and drop a File endpoint from the Endpoints panel to the flow editor

Right click the File endpoint in flow editor and click Properties


This File endpoint works as the source endpoint, which reads files from the directory that specified in the Path property and puts the files into the flow.
Drag and drop another File endpoint from the Endpoints panel to the flow editor

The two file endpoints are linked with an arrow line that indicated the flow direction.
Right click the File endpoint in flow editor and click Properties

Specify the Path property.
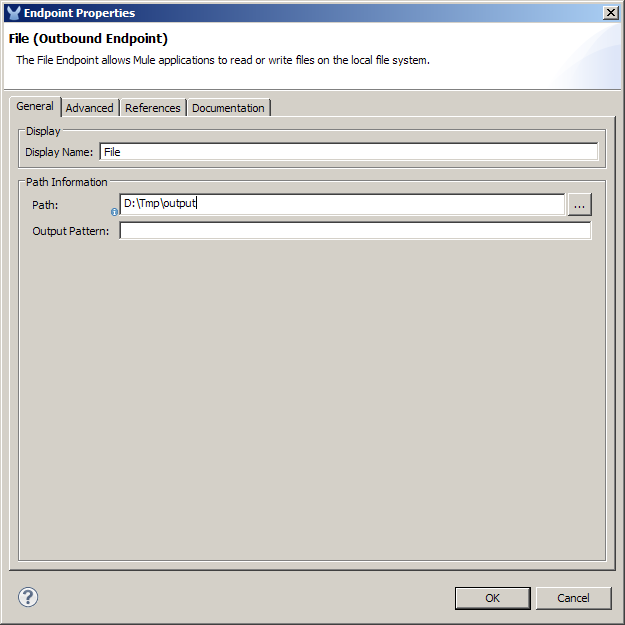
This File endpoint works as the target endpoint, which receives files from the flow and writes them to the directory that specified in the Path property.
Step 6 - Run the Hello World application
Save the project first, then from the Package Explorer right click the current flow and select Run as > Mule Application


Once the application is started, copy a file to the directory specified in the source File endpoint path property. In few second, this file should be moved to the directory specified in the source File endpoint path property.
Now you have a simple Hello World ESB application running in Mule Studio.
Thanks for sharing such a good and informative content to all of us
ReplyDeleteBest Mulesoft Training
Mulesoft Course Online
Mulesoft Training and Certification
Mulesoft Architecture Certification
Mulesoft Course
Mulesoft Developer Certification
Mulesoft Self Learning
Mulesoft Online Training in India
Mule 4 Online Training
Mulesoft Online Training india
Mulesoft Online Training in Hyderabad
Mulesoft Online Training Hyderabad
Mule ESB Training